
|
|

|
|
|
|
Welcome to the Australian Ford Forums forum. You are currently viewing our boards as a guest which gives you limited access to view most discussions and inserts advertising. By joining our free community you will have access to post topics, communicate privately with other members, respond to polls, upload content and access many other special features without post based advertising banners. Registration is simple and absolutely free so please, join our community today! If you have any problems with the registration process or your account login, please contact us. Please Note: All new registrations go through a manual approval queue to keep spammers out. This is checked twice each day so there will be a delay before your registration is activated. |
|
|||||||
|
|
Thread Tools | Display Modes |
 09-11-2010, 09:25 PM
|
#1 | |||
|
AFF Whore

Join Date: Apr 2009
Location: In between gas stations
Posts: 2,246

|
Grandpa_Spec_AUs guide to replacing an AU I6 Falcon water pump.
(If you wish to just get to the point, skip the foreword and begin at the numbered instructions) Yes kids its time again to listen to Granpa_Spec_AUs ranting on DIY mechanical work, how back in his day things werent so complicated, and how this new-age world scares him and Armageddon is coming to rid us of the evil anti-christ that is Justin Bieber . not really. On to the topic at ham! Mmm ham . NO! SERIOUSLY! Now, after getting yelled at by Mr Hardware about 6 months ago for not topping up my radiator, I noticed a small leak kept draining the reservoir every couple of weeks. This suddenly turned into days and then I was topping it up with 4L of water to get to work, then 4L to get home. Turns out it was the heater tap that was busted, and after enlisting the help of my mechanic friend this was quickly replaced, however, the waterpump was also showing signs of leaking from the return pipe, as well as around the outside. As the car is getting on, I thought it best to just replace the thing and be done with it. So here it goes: *** N.B. If you want to play it super safe, remove your negative battery terminal *** Tools you will need can be seen in the pic below, they consist of: a.) Phillips and Flat blade screwdriver b.) 10mm Socket with extentions c.) 10mm Open/Ring/Ratchet spanner d.) Pliers e.) Thread sealant f.) 1 pen, so you look professional 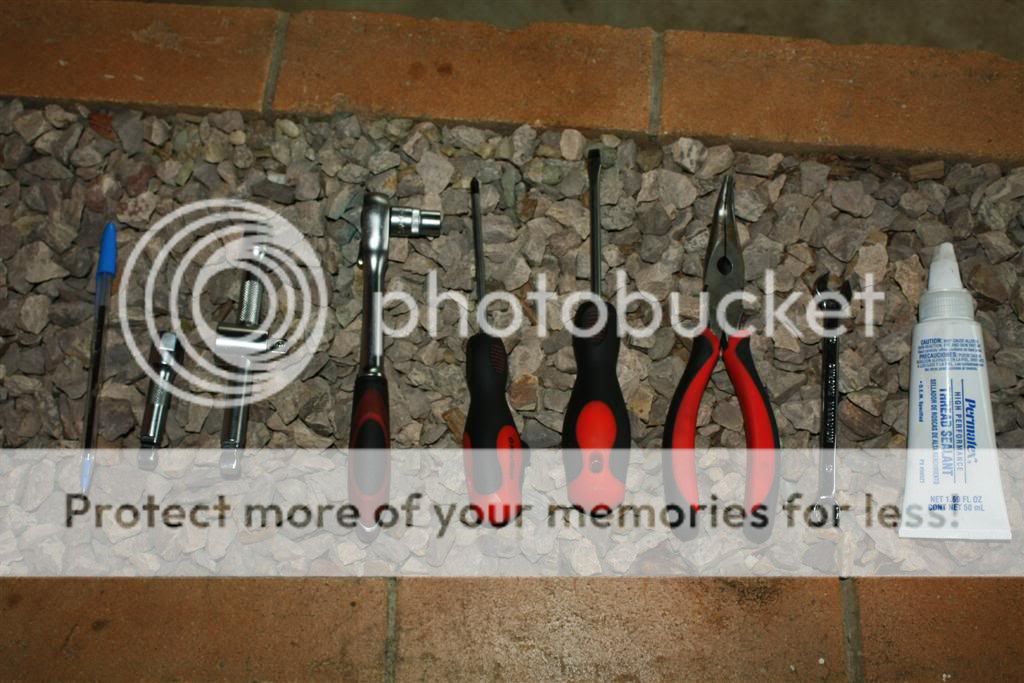 1. Remove the air snorkel by taking out two Phillips head screws holding it in place, wiggle it off the airbox and remove from the engine bay.  2. Next take a 10mm socket and remove the nut holding down the plastic protector. 3. Remove the power steering cap and pull off the plastic protector, ensuring to replace the cap once the protector is off. 4. OPTIONAL: If you have the VCT motor you will also need to disconnect the wiring from the solenoid, then push the plastic lugs back through so you can separate the wire from the protector and place it to the side. 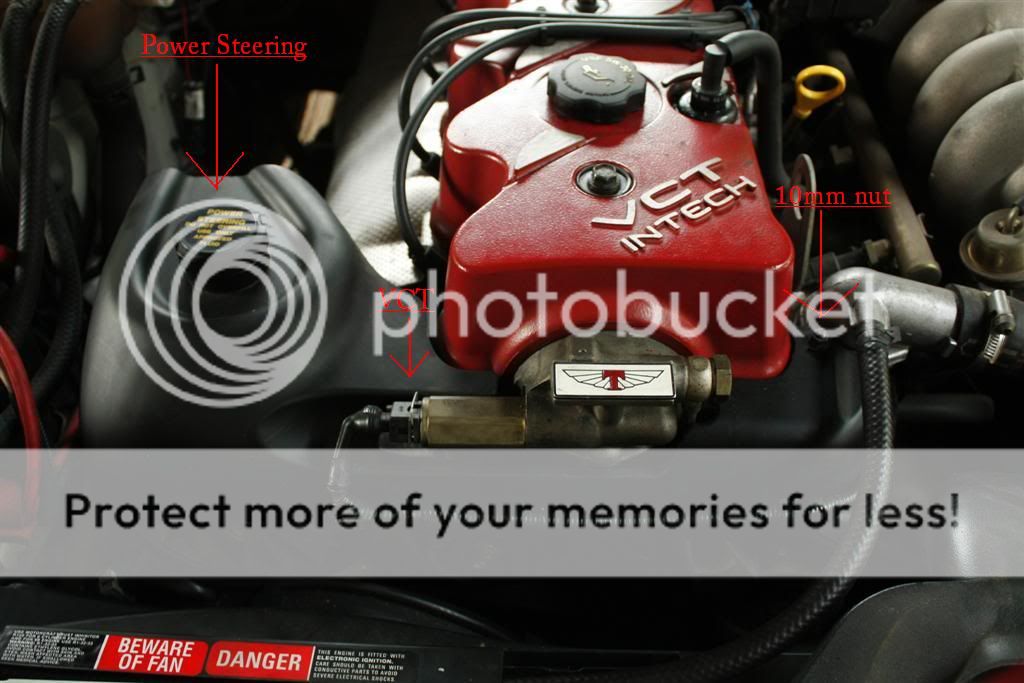 5. To remove the thermo fans, take your 10mm socket and undoing both bolts at either side. 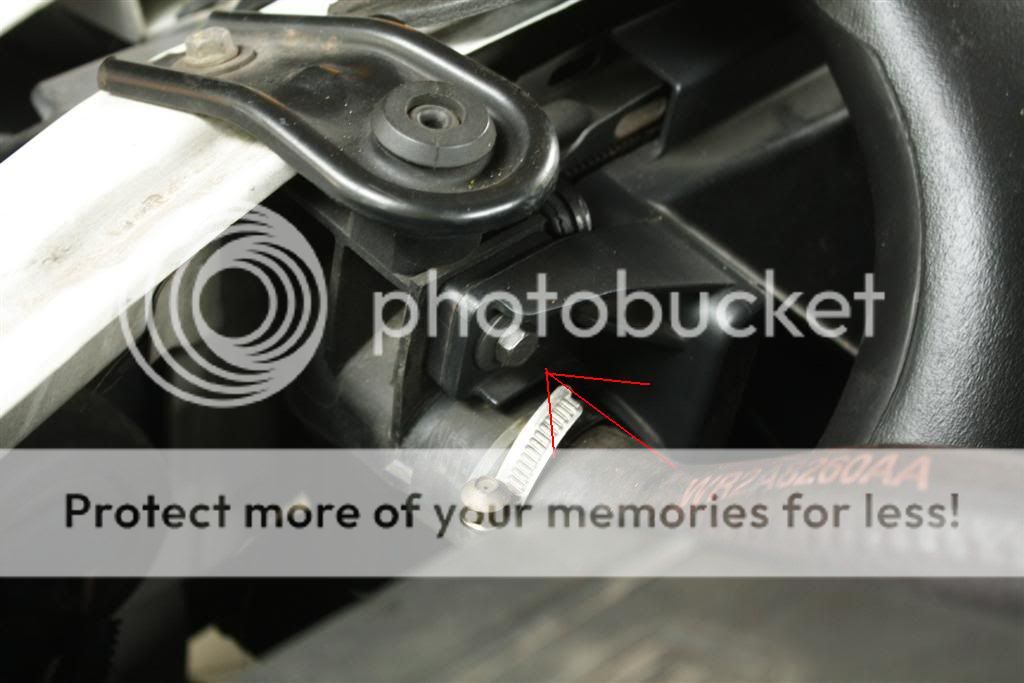 6. Disconnect the plug going to the thermo fans and remove the thermo fans, placing them aside. (This is located on the left side when facing the car front on) 7. Remove the belt by levering the tensioner towards the left of the car, and slide the belt off the A/C compressor (easiest way I found was to just use a large plank of wood and jimmy it between the A/C and the tensioner.) Some like to draw a little diagram to remember how the belt fits on, and its a damn good idea! Check the resources on the forum here if you are unsure. 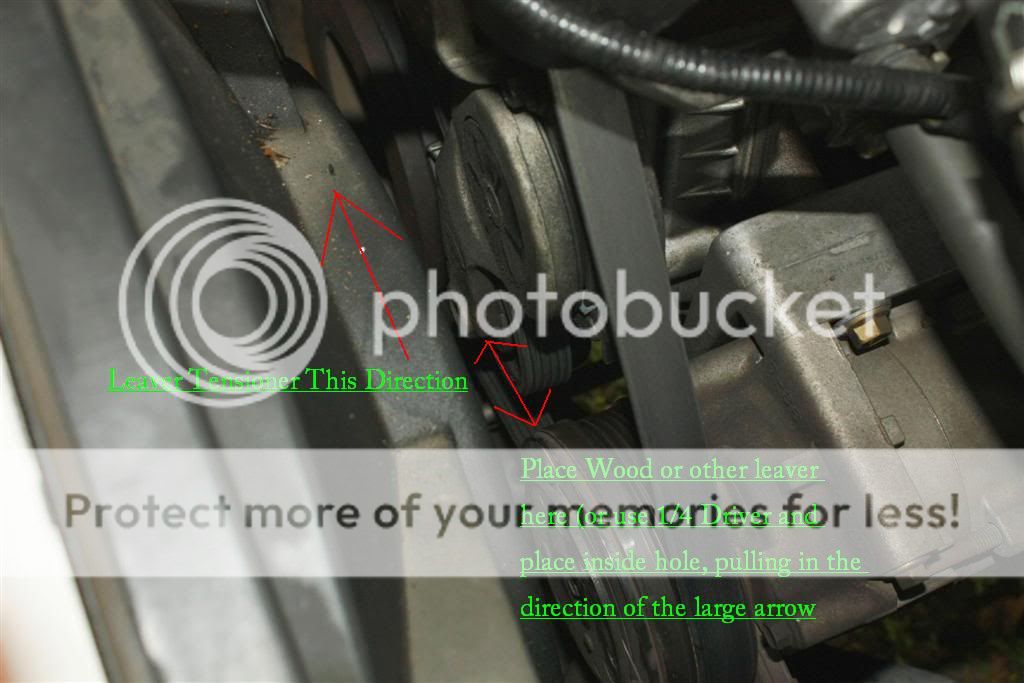 8. This is the fun part! On the left hand side (facing the car front on), using a Phillips or flat blade screwdriver, get under the car and undo the bottom clasp that is holding the radiator hose on. Get above the car and persuade the hose off the radiator, this is going to gush out water at a rate of knots so dont get your face near it! (i.e. do it from underneath!) You may want to mark which end is which with your pen.  9. Remove the other end of the radiator hose you disconnected from the waterpump, this was a ROYAL PAIN IN THE BUTT as the clasp has a funny little head on it, which requires some sort of special tool like myself with pliers  Undo this (However you can) and then FORCE IT WITH ALL YOUR MIGHT! I ended up borrowing a hair dryer and heating the pipe up to a billion degrees so that it would come off, as there is a little lip that seems to hold it in place. I couldn't get a photo of the bugger as my camera wouldn't fit, so just stick you head inside they engine bay, you'll soon meet your adversary. (***NOTE!: If you look at the image for step 5, the head of the metal clasp holding the heater hose onto the top of the radiator is the same as mentioned above) 10. Next, there are four bolts holding the pump to the engine block. Getting to them left me with hands that shared a striking similarity to grated cheese, as the ¼ driver socket set I was using was too big to fit behind the water pump drive wheel. So, using either spanners, ratchet spanners or a socket set, undo the four bolts, more water will come out and its gonna smell really bad! Below is a photo of the one I took out to serve as a guide. Rear of waterpump: 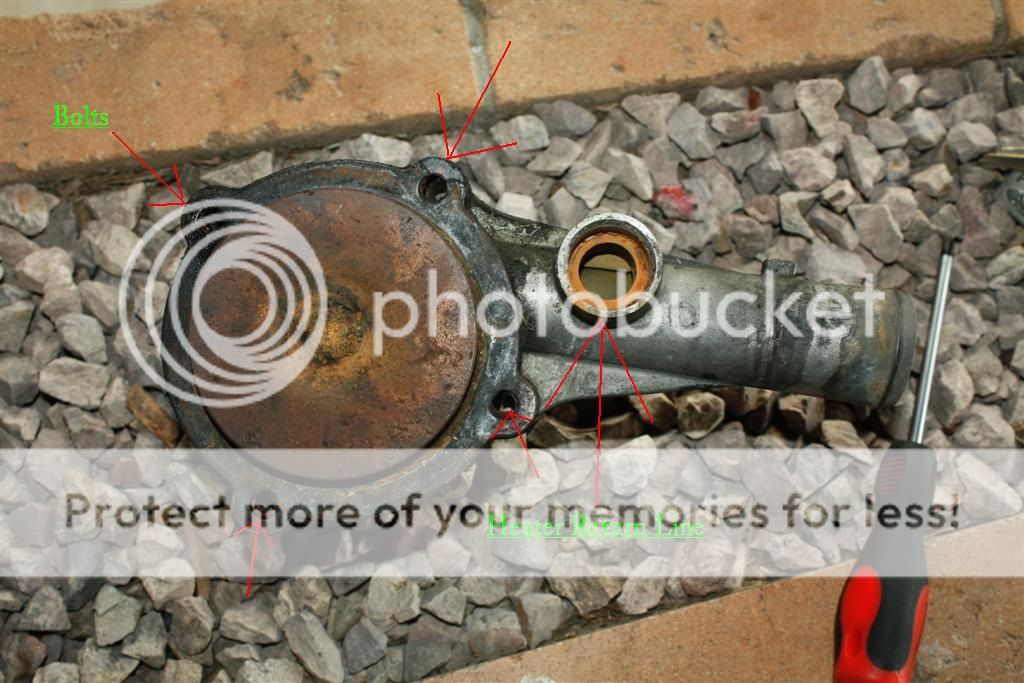 Front of waterpump: 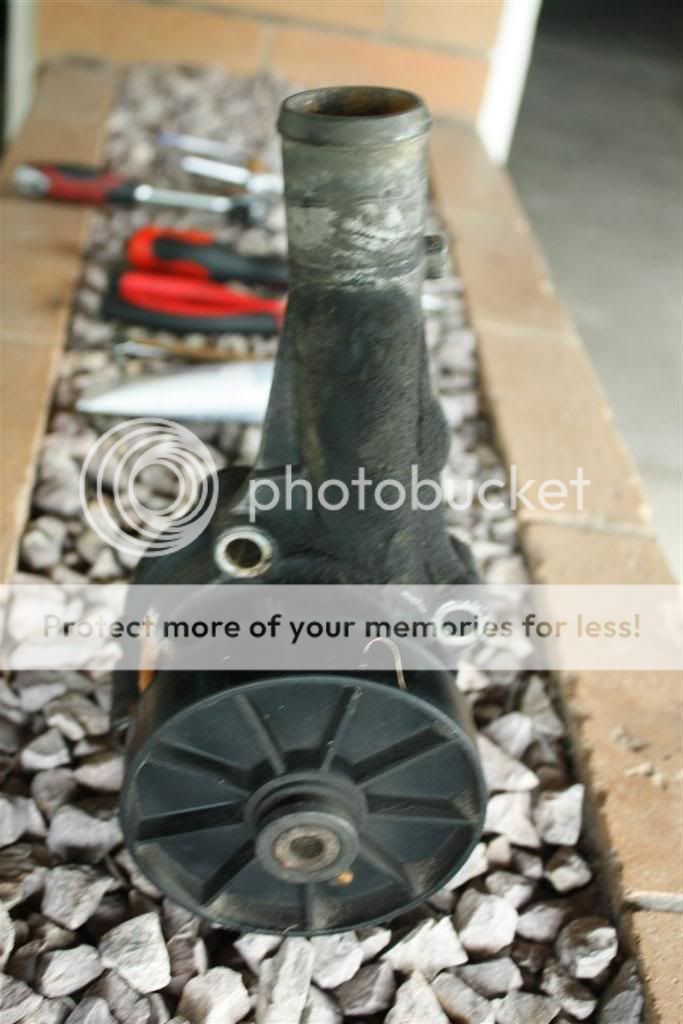 11. Remove the waterpump and clean down the area where it was, ensuring you also clean inside the heater return pipe. 12. Go and unpack your new water pump, ensuring you get all the little gaskets etc. that came with it. 13. Use some lubricant (I used Vaseline) and grease up the inside of the heater return hole, placing the O-ring gasket inside this. 14. Clean down the bolts you removed and put some thread sealant onto them, then place them into the new waterpump so they are just sitting in there. 15. Install your new waterpump and ensure the heater return line is correctly lined up, and gradually tighten the 4 bolts as you would car wheel nuts. (I.e. criss cross) until you cant tighten them anymore without using some force, this should results in no leaks. To loose, and water ****ed out everywhere, too tight and youre in a whole lot of trouble. 16. Reattach the radiator hose to the waterpump and radiator, doing up the metal clasps. 17. Fill the car up with water and check for leaks. 18. Reinstall the belt, thermo fans and plastic protectors (and VCT wire if needed). 19. Ford also specifies that you need to run the car for 10 minutes at 2000rpm in order to get the air out of the system. 20. Mount your waterpump in the garden somewhere and fill it with flowers, works rather well as an ornament :P This guide is provided only as an example of it can be done. By no means is it authoritative or comprehensive, its just how I did it. Thank you to Mr Hardware and Whoosa for proof reading and general advice  The car in question was my AU Series 1 Fairmont Ghia, however all the I6 engines from series 1 onward should be the same. Regards, Grandpa_Spec_AU
__________________
Favorite Quote: Quote:
Last edited by Whoosha; 10-11-2010 at 06:01 PM. |
|||

|

|
| 6 users like this post: |


 Threaded Mode